Monday, July 21, 2025

Homemade Ice Cream in a Bag – Science + Snack!

A close-up of creamy homemade vanilla ice cream served in a zip-top bag with a spoon, placed on a wooden surface

Making homemade ice cream might sound like a fancy kitchen task, but what if I told you, it could be as simple as shaking a bag? That’s right! With just a few ingredients, a bit of ice, and a sprinkle of salt, you and your little ones can whip up a frozen treat right at home—no machine required. Even better? It’s not just a delicious snack; it’s also a fun science experiment in disguise.


As moms, we’re always looking for hands-on activities that can entertain and educate at the same time. Whether it’s the weekend, a school break, or just one of those “I’m bored” days, this homemade ice cream in a bag recipe checks all the boxes. It’s quick, it’s budget-friendly, and most importantly, it’s exciting for kids of all ages. Plus, cleanup is a breeze—what more could we ask for?


In fact, this little project introduces children to basic scientific concepts such as freezing points and chemical reactions, all while keeping their hands busy and their curiosity engaged. Because let’s face it—when learning tastes this good, it sticks.


Moreover, this activity encourages quality time. You’re not just making dessert—you’re making memories. And while you could easily buy a tub of ice cream from the store, there’s something incredibly special about making it together, from scratch. Every shake of the bag becomes a laugh, every icy fingertip a giggle.


So, if you’re searching for a fun way to beat the heat and sneak in a little learning, keep reading. This homemade ice cream recipe might just become your new favorite go-to activity. It’s the perfect blend of science, sweetness, and shared smiles.


Sunday, July 13, 2025

Easy Kids Craft: Make a Magical Laundry Monster That Eats Dirty Socks!

A child feeding a striped sock into a purple monster box craft with googly eyes, sharp white teeth, and orange pipe cleaner hair.

We’ve all been there—laundry baskets overflowing, socks mysteriously disappearing, and kids somehow allergic to putting their dirty clothes in the right place. But what if you could turn laundry time into playtime? Enter: The Magical Laundry Monster—a delightful and silly creature your child makes themselves, whose favorite food is… dirty socks!


This project isn’t just adorable—it’s also an easy kids craft that encourages responsibility, imagination, and giggles. Plus, it gives those rogue socks a proper home (until you get around to washing them).


Let’s walk through how to create your very own sock-snacking monster and why this might be your new favorite family craft.


Why Make a Laundry Monster?

A cozy and organized children's bedroom with a trail of colorful socks scattered across the wooden floor, leading from the bed toward a play tent
Before we dive into materials, let’s talk benefits.

✅ Encourages kids to put their socks in one place

✅ Promotes creativity through color and storytelling

✅ Turns chores into games (goodbye power struggles!)

✅ Supports motor skills through cutting, gluing, and assembling

✅ It’s one of those rare easy kids' craft projects that feels purposeful


Let’s get started.


Materials You’ll Need:


Most of these items can be found at home or in your recycled bin!

1 medium cardboard box (shoe box or cereal box size)

Colored paper or paint

Googly eyes or buttons

Pipe cleaners or yarn (for hair or antennae)

Scissors

Glue stick or glue gun (with adult supervision)

Tape

Markers

Fabric scraps, foam, or felt (optional)


Step-by-Step Instructions


1. Choose Your Box


Find a medium-sized cardboard box that’s light enough for your child to carry but large enough to fit a few pairs of socks.


Cereal boxes work well if you want a tall monster; tissue boxes are perfect if you want a wide-mouth design.


2. Cut the Mouth

a square kraft cardboard box with a rectangular open as a mouth for the monster.


This is where the magic begins! With adult help, cut out a large “mouth” on one side of the box.


It should be wide enough to easily toss socks through. Make jagged edges if you want “teeth,” or add felt triangles to give it a goofy grin.


3. Paint or Wrap Your Monster

A purple rectangular box with a large cut-out mouth and white triangular teeth, designed as a monster for a fun sock-feeding activity.

Use colorful paint or wrap the box with construction paper. Let your child choose the monster’s color theme—green with purple spots? Pink with rainbow stripes? Anything goes!


Encourage them to use markers to add freckles, stripes, or even fur texture.


4. Add Eyes

a square purple monster craft, with pointy teeth and googly eyes

Glue on googly eyes or buttons to create silly or scary expressions. For extra fun, make the eyes uneven or three in a row!


You can also use paper towel rolls for big bulging eyeballs or stick them on pipe cleaners to make wiggly antennae.


5. Make It Hairy


Attach yarn, string, or shredded paper to the top of the monster’s head for wild, spiky hair. Or twist pipe cleaners for crazy curls.


This step always gets the most giggles!


6. Decorate with Personality


Let your child go wild. Add:

A bowtie or necklace made from felt

A name tag (“Hi, I’m Mr. Sock-Eater!”)

Tiny arms or feet made from cut paper


Remind them there’s no “right” way to do it—it’s their creature!


7. Tell the Story


Once it’s done, give your monster a name and a story. Maybe it only eats left socks, or maybe it dances every time someone feeds it. The sillier, the better!


This storytelling element adds an emotional connection to the craft—kids are much more likely to use it if they helped invent the personality.


How to Use Your Laundry Monster


Now that your monster is hungry and ready, place it in your child’s room, near the bathroom, or by the laundry area.


Every time they remove their socks, the challenge is: “Feed the Monster!”


You can even say:

“Oh no! He’s starving! Quick, toss him a stinky sock!”

“He only eats dirty socks after 6 p.m.—hurry before he gets hangry!”


Gamifying chores like this is surprisingly effective, especially for ages 3–8.


Bonus Variations


If your child loves this easy kids craft, try these upgrades:

Mini Monsters for Toys: Use small boxes to create snack monsters that “eat” toy pieces, LEGOs, or puzzle bits.

Recycle Monster: Turn it into a paper or bottle collector for eco-learning.

Laundry Dragon: Add wings and turn it into a fire-breathing sock guardian!


Transitioning into these versions helps build long-term habits—plus, it gives you more reasons to craft together again.


Why This Easy Kids Craft Works


Let’s face it—telling kids what to do doesn’t always work. But inviting them into the process of creation? That’s powerful.


This activity blends imagination with purpose. You’re not just building a craft—you’re creating a character, a routine, and a reason.


And because it uses everyday materials, it feels approachable even if you’re not a Pinterest-perfect parent. It’s just about connecting, laughing, and giving your child a sense of ownership.


Final Tips to Keep It Fun

Keep glue time supervised for younger kids

Let them name the monster—it increases their attachment

If it gets worn out, no stress: make another one next weekend!

Compliment them when they “feed the monster”—positive reinforcement helps the habit stick


Final Thoughts: Turning Mess into Magic


Parenting is full of tiny daily battles—laundry, tidying up, cleaning sticky hands. But when we turn those battles into games, everyone wins.


The Magical Laundry Monster isn’t just a box. It’s a tool for cooperation, independence, and creativity. And it might just save you a few sock-hunting headaches.


So go ahead—grab that cereal box, some googly eyes, and your child’s wildest ideas. Let them invent a monster they’ll love… and you might just fall in love with it too.


📸 Share your Monster!


Did your child make their own sock-chomping monster? I’d love to see it! 


Also Read


Thursday, July 10, 2025

Ten Summer Snacks My Kids Actually Love (That Are Healthy and Quick!)

A white woman with brown hair, wearing a beige apron, prepares a colorful and healthy snack using fresh fruits, nuts, and seeds on a wooden board in a bright, modern kitchen. Her face is not shown, keeping the focus on her hands and the natural ingredients.

If your kids are anything like mine were, then they seem to get hungrier the moment school is out. Summer means more play, more energy spent—and somehow, more “I’m hungry!” whines echoing through the house.

As a mom juggling creativity, work, and the chaos of summer break, I’ve learned the hard way that snacks can make or break the day. And if you’re trying to balance nutrition, speed, and a sprinkle of fun? Well, you’re in the right place.

So today, I’m opening my kitchen and my heart to share with you the healthy summer snacks my kids actually love—and trust me, I’ve tested plenty that didn’t make the cut!

These are quick, simple, and made with real ingredients I can feel good about—plus, they’re all approved by my toughest food critics: my daughters.


Wednesday, July 09, 2025

5 Crafts to Keep Your Kids Creative Without Screens

A vibrant collage featuring five fun and educational summer crafts for kids: a nature mandala made of leaves and flowers, handmade magic wands with colorful ribbons, a recycled robot made from cardboard and buttons, a sticker storybook with a child’s hands drawing, and two round salt dough ornaments with a heart and leaf design.


 Dear Super Moms,

Summer is here—and with it, the endless chorus of “I’m bored!” If you’re like me, you’re constantly looking for creative ways to keep your children entertained, engaged, and off their screens—without spending a fortune.

Today, I’m sharing 5 simple, screen-free crafts that spark imagination, boost focus, and bring your family closer together. These are tried-and-tested activities from my own “supermom” toolkit—and most of them use materials you already have at home!


1. Nature Mandala Collage

A flat-lay image of a symmetrical nature mandala arranged on a white background using green leaves, yellow petals, brown seeds, small white flowers, and a pinecone at the center. The natural elements are laid out in a radial pattern, creating a peaceful and harmonious design.
Go outside, collect leaves, twigs, flowers, and pebbles, and create a mandala together on the floor or a large sheet. It’s relaxing, beautiful, and teaches symmetry and patience.


🟢 What you’ll need: paper or cardboard base, glue, collected nature items

🎯 Age: 3+

💡 Tip: Take a picture before you clean it up—it makes a lovely memory!


2. Magic Wands with Personality

Five handmade magic wands crafted from wooden sticks are displayed on a light wooden background. Each wand is decorated uniquely with colorful yarn, felt shapes, ribbons, or beads, including a yellow star-topped wand with pink ribbons, a purple bow wand, and wands with orange-blue yarn or stacked wooden beads.
Transform chopsticks or sticks into sparkly magic wands using ribbons, beads, yarn, and hot glue. Let your kids invent spells and stories—perfect for roleplay and storytelling!


🟢 What you’ll need: sticks, ribbons, glue, decorations

🎯 Age: 4+

💡 Tip: Ask your child to name their wand and describe its power. You’ll be amazed!


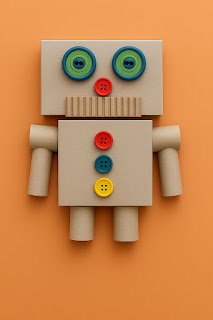
 3. Recycled Robot Workshop

A cute robot figure made from recycled cardboard materials is displayed on an orange background. The robot has a rectangular head and body, button eyes and controls, a corrugated cardboard mouth, and arms and legs made from paper tubes, showcasing a creative and eco-friendly kids’ craft.
Gather toilet paper rolls, buttons, bottle caps, and boxes to create funky robot creatures. A wonderful STEM activity that encourages kids to upcycle and imagine.


🟢 What you’ll need: recyclables, glue, markers

🎯 Age: 5+

💡 Bonus: Turn it into a “Robot Fashion Show” for extra giggles.


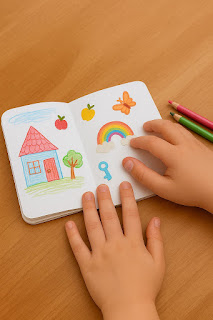
4. Sticker Story Book

A child’s hands are seen decorating a handmade storybook with colorful stickers and crayon drawings. The open notebook shows a red-roofed house, a tree, butterflies, and a bunny holding a carrot, along with flower and duck stickers. Three crayons rest on the wooden table nearby.

Fold A4 papers to make a mini book and let your child decorate each page with stickers and drawings. Ask them to invent a story and read it aloud at the end!


🟢 What you’ll need: paper, stickers, colored pencils

🎯 Age: 3–8

💡 Connection time: Do this activity together before bedtime for a cozy moment.


5. Salt Dough Memory Tiles

Two round salt dough ornaments are displayed on a wooden surface. One features a green heart shape pressed into the dough, and the other showcases a green fern leaf imprint. Both crafts have a soft, handmade appearance and are used for nature-inspired memory keepsakes.
Make salt dough together, shape it into hearts or circles, and press little hands or summer finds (shells, leaves) into them. Once baked, paint and seal!


🟢 What you’ll need: 1 cup flour, 1/2 cup salt, 1/2 cup water

🎯 Age: 4+

💡 Keepsake idea: Write the date and your child’s name on the back.


Why These Crafts Matter

In a world full of screens and noise, hands-on creativity is medicine. It helps kids focus, express themselves, and build emotional resilience—all while creating unforgettable memories with you.

Let this summer be one of simplicity, joy, and connection. 

📸 I’d love to see your little artists in action!

If you try any of these ideas, share a photo with me on Instagram or tag me with #MariaSupermomCrafts


With love and paint-stained hands,

Maria


You can also read:


Tuesday, July 01, 2025

DIY Cardboard Fish- A Fun Upcycled Craft with Texture and Color


Flat lay of cardboard fish craft materials on a light wooden surface, including a piece of corrugated cardboard with a pencil, colorful paper sheets, round paper cutouts, glue, scissors, a black marker, a googly eye, and a finished fish decorated with rainbow paper scales and a smiling face.


Dive into creativity with this eco-friendly cardboard fish craft! It’s a wonderful project for kids, parents, or anyone wanting a relaxing, tactile experience. Using recycled cardboard and a splash of color, this fish will look charming on a wall or even as part of a mobile.


✂️ Materials Needed:

A piece of cardboard (from any box)
Pencil and scissors
White glue or glue stick
Colorful craft paper scraps (or tissue paper, magazine cutouts, or old wrapping paper)
Markers or paint (optional for detailing)
Googly eye or black marker
String (if you want to hang it)
Optional: aluminum foil for shiny fins


🧭 Instructions:


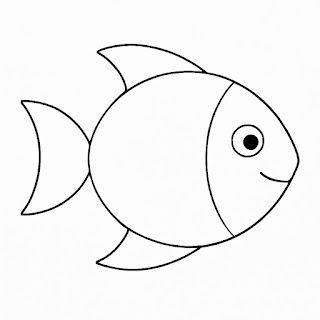
1. Draw and Cut the Fish Shape

Sketch a simple fish on cardboard — big round body, triangle tail. Cut it out. 
Download and print the fish design. Just click on it!

2. Create Scales

Cut circles or teardrop shapes from colorful paper. Overlap and glue them to form scales across the body.

3. Add Fins and Tail

Glue extra cardboard or foil cutouts for the tail and fins to give them texture.

4. Add an Eye

Stick on a googly eye or draw one with a marker.

5. Detail and Finish

Use markers or paint to add dots, gills, or outlines. You can also punch a hole at the top and tie a string to hang your fish.


💡 Creative Tip:


Each fish can have a personality! Try making a whole school of fish in different colors and sizes—great for classroom decorations or home art corners.


🎯 Why It’s Therapeutic:


This project invites focus through cutting, layering, and arranging—excellent for calming the mind and boosting creativity.

Homemade Ice Cream in a Bag – Science + Snack!

Making homemade ice cream might sound like a fancy kitchen task, but what if I told you, it could be as simple as shaking a bag? That’s righ...